The Web API in Power Pages is a powerful feature that helps developers connect and work with Dataverse tables more easily. It makes managing data—like retrieving, updating, or deleting records—much smoother and faster. This improves both the performance and user experience of your portal.
In this beginner-friendly guide, we’ll explain why the Web API is important, show you how to set it up step by step, share real-world examples, and answer common questions. Whether you’re new to Power Pages or looking to enhance your portal, this guide will help you get started with the Web API the right way.
Top Benefits of Using Power Pages Web API
Using the Power Pages Web API can greatly improve how your portal works and feels. Here are some key advantages:
Improved User Experience
The Web API helps you build dynamic features like interactive forms and editable lists. This makes your portal more engaging and easier for users to navigate.
Stronger Data Control and Security
Developers can decide which data fields are available through the API. This adds an extra layer of protection and ensures sensitive information stays safe.
Easy System Integration
While it’s mainly used to enhance Power Pages, the Web API can also connect your portal with other apps or systems, making your setup more flexible.
Faster Performance with Caching
The Web API supports server-side caching, which means repeated data requests load faster—saving time and improving speed for users.
How to set up Web API in Power Pages
Step 1: Turn On Web API for Your Power Pages Site
- Open the Portal Management App from your Power Platform environment.
- In the left-hand menu, click on Site Settings to access the configuration options for your portal.
- Enable the Web API Feature in Site Settings
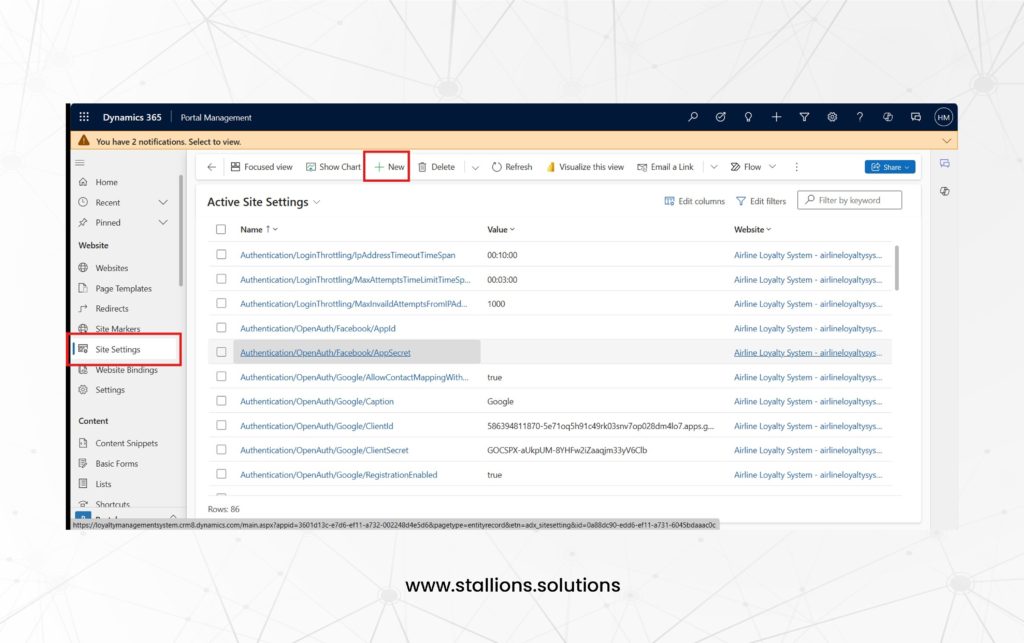
To turn on the Web API for your portal:
- Add a new site setting with the following details:
- Name: Webapi/Enabled
- Value: true

- To help with debugging and troubleshooting, you can enable detailed error logging for the Web API. Just add another site setting:
- Name: Webapi/error/innererror
- Value: true

Step 2: Enable Web API for a Table
1. Open the Portal Management App.
2. Go to Site Settings in the left pane.
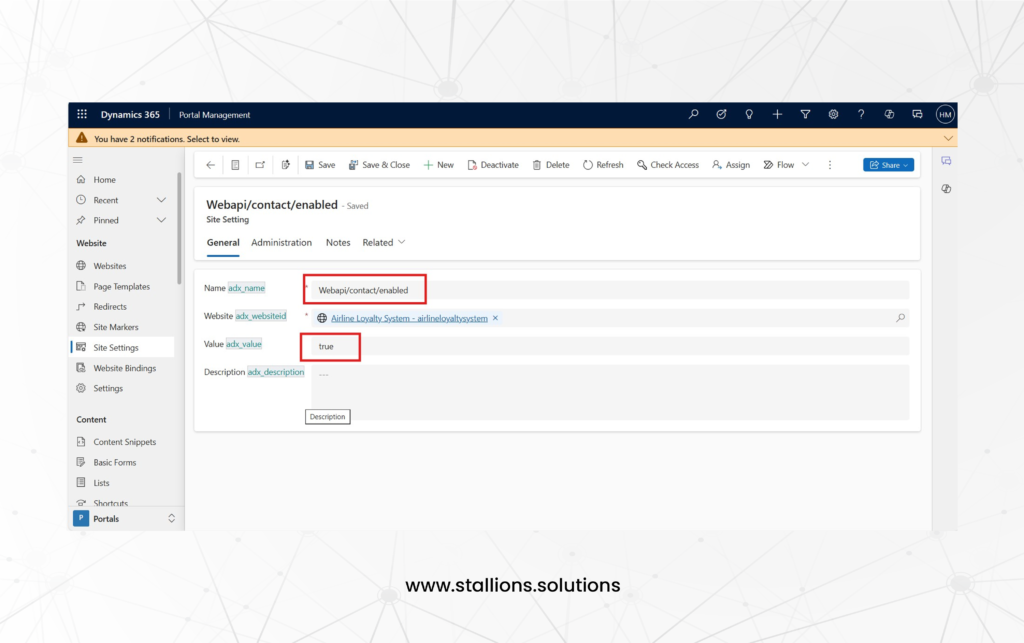
3. Create a new site setting to enable the Web API for a specific table (e.g., contacts).
- Use this format: Name: Webapi/table_logical_name/enabled
- Value: true
- Example: If enabling it for the “contact” table, use Webapi/contact/enabled
4. Define which fields can be modified using the Web API
- Name: Webapi/table_logical_name/fields
- Value: List of fields separated by commas (e.g., firstname,emailaddress1) or use * to allow all fields.

Step 3: Set Up Table Permissions for Web API Access
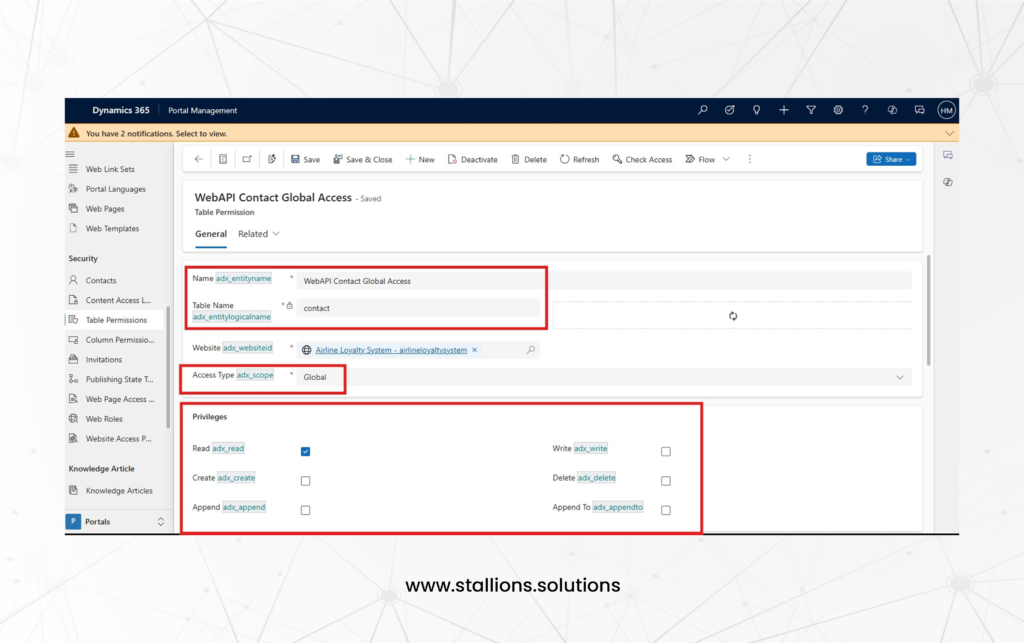
To allow the Web API to access your Dataverse table, you need to configure table permissions:
- Create a new table permission for the specific table you want to work with through the Web API.
- Fill in the required fields, such as:
- Access Type (e.g., Global or Contact)
- Privileges (like Read, Write, Create, Delete)
- Web Roles that should have access
Step 4: Configure Web API Safe AJAX Wrapper
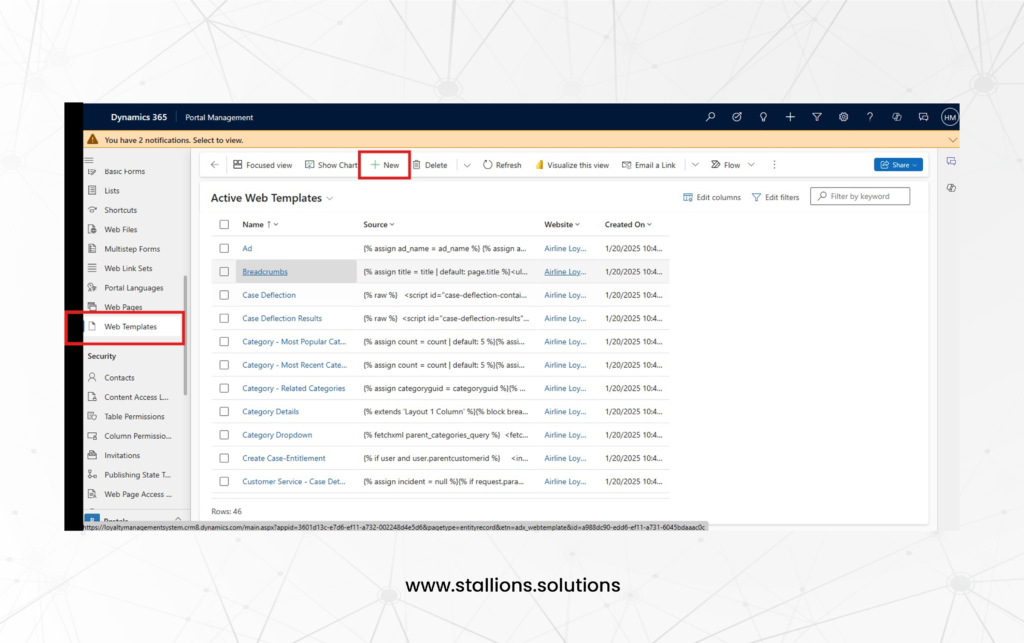
1. Open the Portal Management App and go to Web Templates under the Content section.

2. Click New and select the website where you want to create the template. Name it something like “Portal Web API Wrapper.”
3. Add the following AJAX wrapper function to the Source field of your template. This function manages authentication and token handling for Web API requests. Be sure to wrap it in <script> tags before saving.
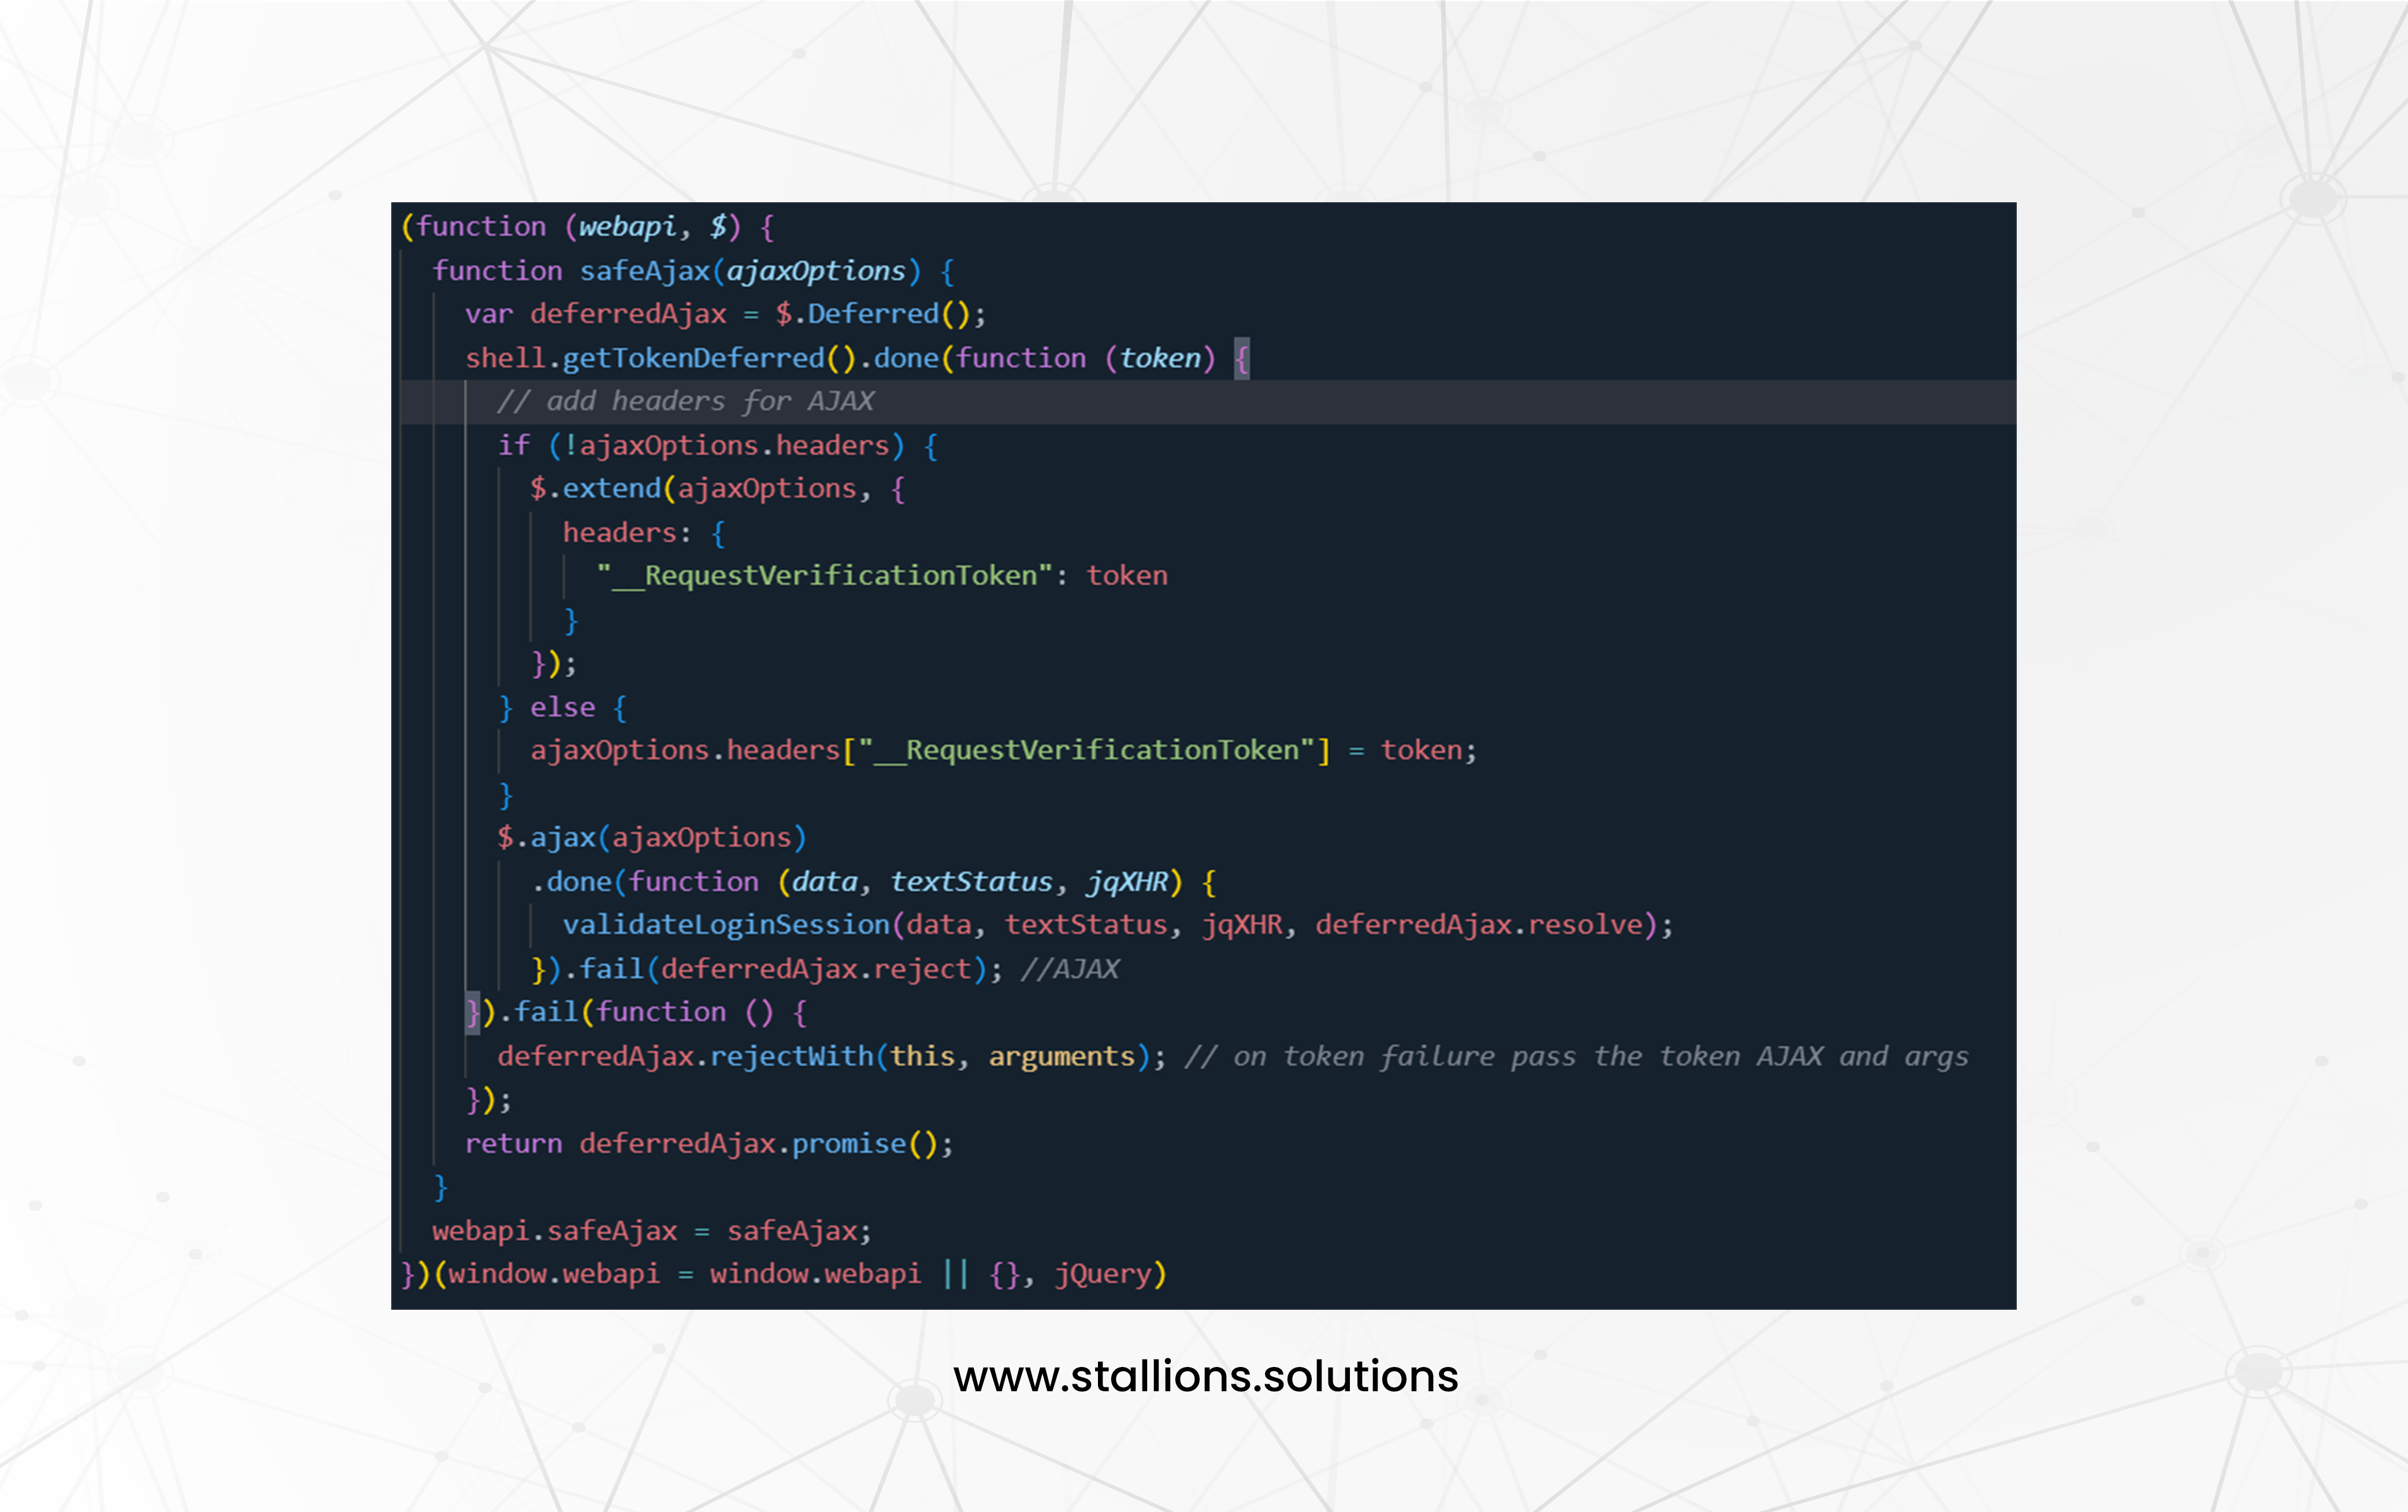
4. Include the Wrapper in Your HTML: Wherever you plan to use the Web API, insert the wrapper function by adding {% include ‘Portal Web API Wrapper’ %} before making any API requests.
Frequently Asked Questions About Power Pages Web API
1. What is the main purpose of the Power Pages Web API?
The Web API lets you perform CRUD operations—Create, Read, Update, and Delete—on Dataverse tables directly from your Power Pages site. This makes managing data easier and improves the overall user experience.
2. Which HTTP methods does the Web API support?
The Web API supports the following HTTP methods:
- GET – to read data
- POST – to create new records
- PUT – to update existing records
- DELETE – to remove records
3. Can I use the Web API with configuration tables?
No, the Web API only works with data-related tables like accounts, contacts, and custom tables. It does not support configuration tables such as adx_contentsnippet, adx_entityform, or adx_entitylist.
4. Are Web API operations case-sensitive?
Yes, they are. Make sure that table names and field names exactly match the casing used in Dataverse to avoid errors.


