
Generative AI is transforming the way companies operate, prompting them to seek ways to utilize this technology to drive value and enhance efficiency in all industries.
Like OpenAI, Microsoft is leading the charge in enabling business users to leverage generative AI through Microsoft Copilot Studio. This platform offers a user-friendly, no-code graphical interface that simplifies the creation of custom copilot experiences, removing the necessity for specialized skills from data scientists or developers.
You can make your first copilot with the help of our article. You learn how to add topics to your copilot, test real-time content updates, and launch your copilot on a test page.
How To Create a Copilot
- Open microsoft copilot studio’s official webpage. It is available with Microsoft edge, firefox, or chrome.
- When you sign up, the power apps environment will be automatically configured. You can change the setting to meet your requirements.
- Select “Create a copilot” from the home page.
- A wizard will appear. Now, you can assign a name to your copilot.
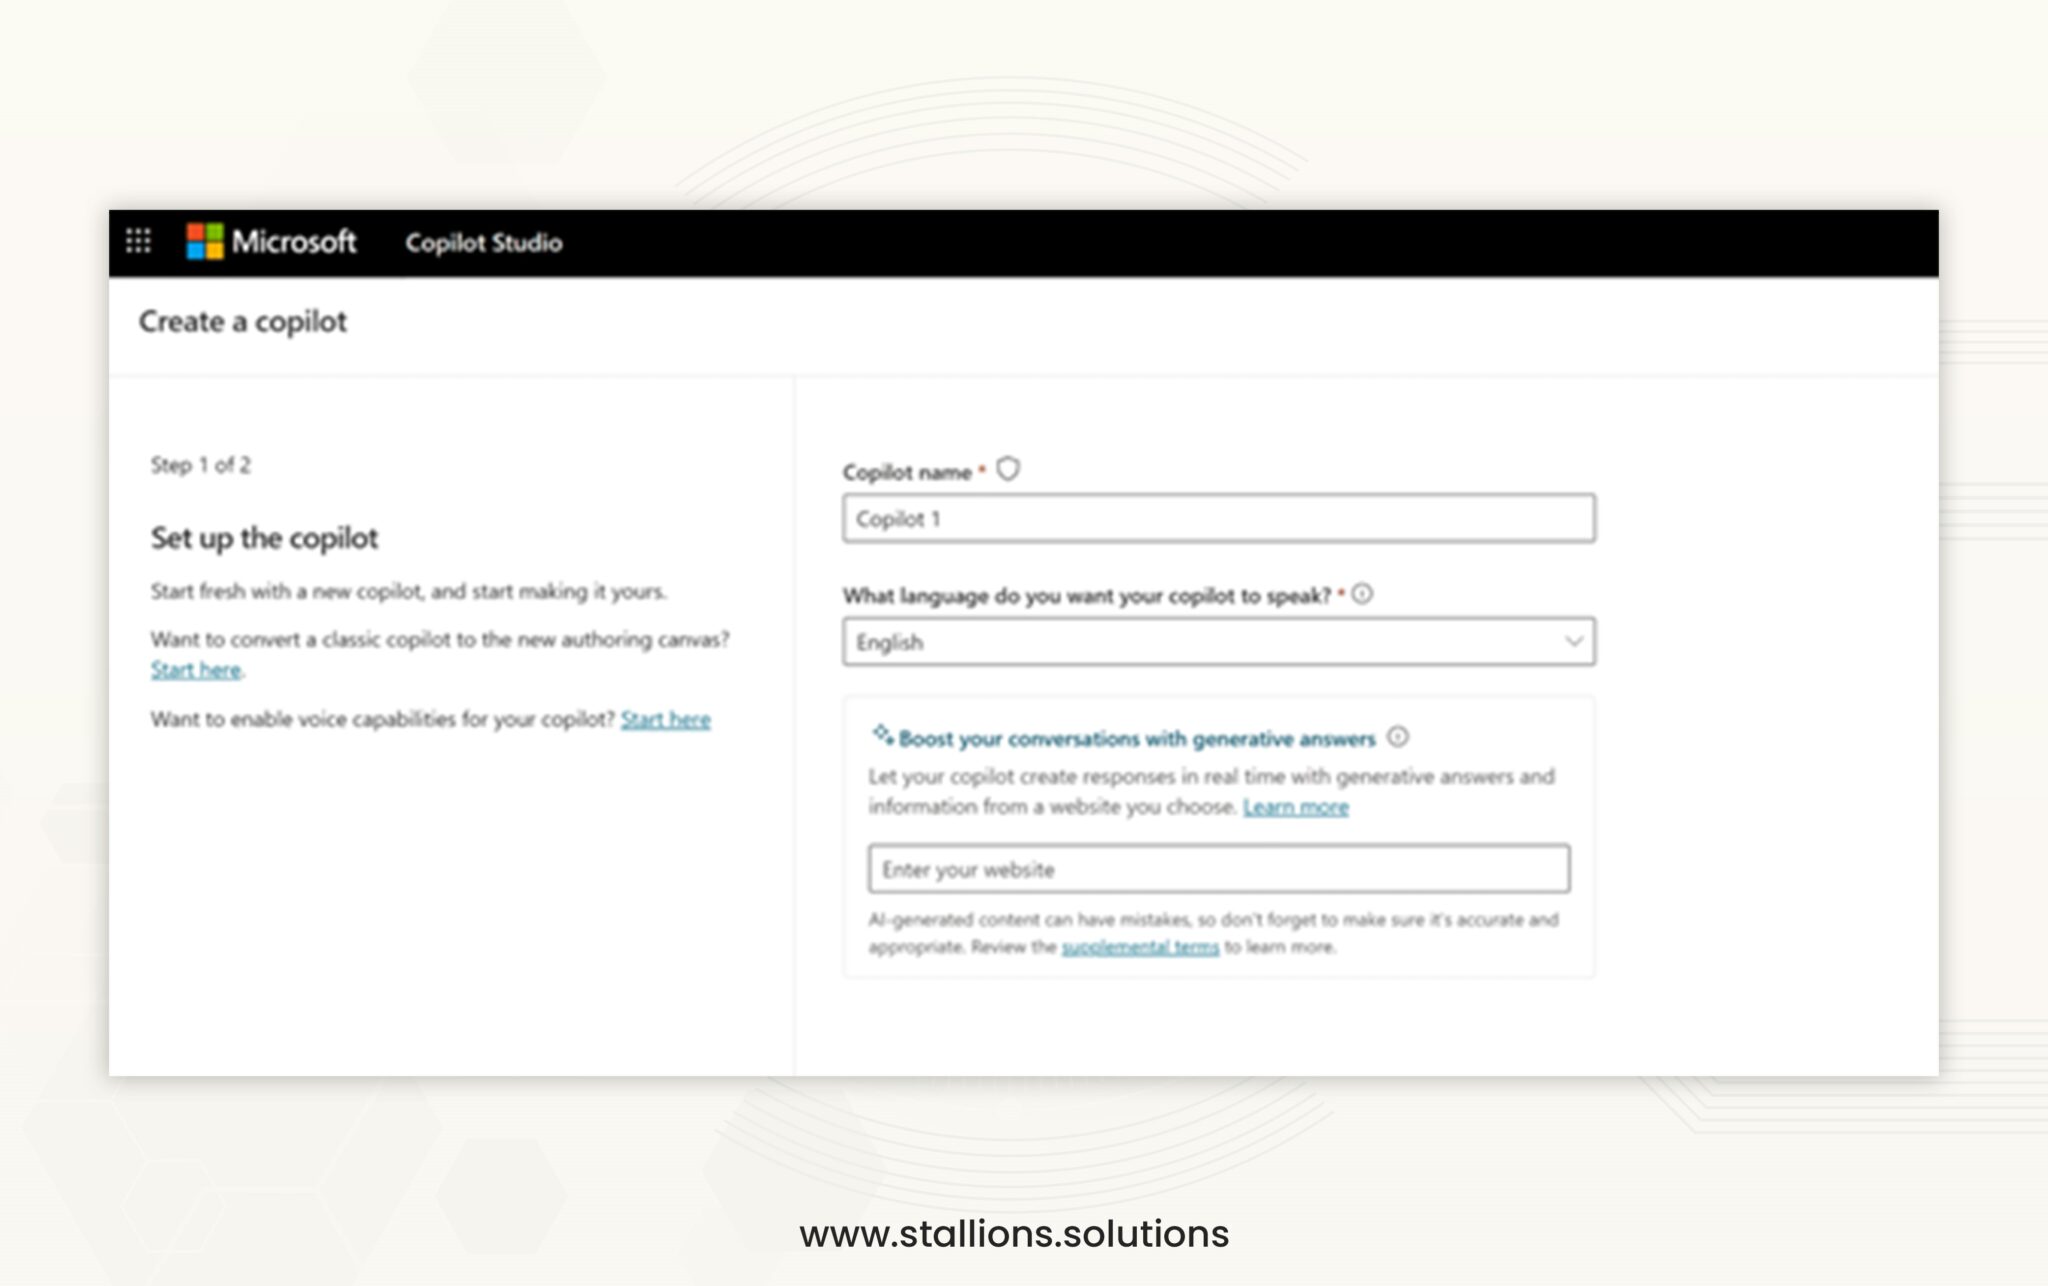
- By selecting the language from the dropdown menu, you can guide your copilot to speak that language.
- Use the generated replies section to enhance your chats by adding a URL. You can choose not to do this.
- Your copilot can be further improved and customized. Choose the Edit Advanced option located at the bottom of the page to begin.
- By uploading a custom icon or picking one from the list of icons, you can give your copilot a unique personality. To create introductory content, you can also select from a list of instructional themes. Next, select your copilot’s Solution and Schema name.
- To construct your copilot, click the construct button and give it up to fifteen minutes. You will then be taken to the copilot’s overview page after completing this step.
Creating a topic in Copilot
Creating topics in the new copilot is simple to get started with. Like a dialogue tree, a topic describes how your copilot will react to inquiries from users.
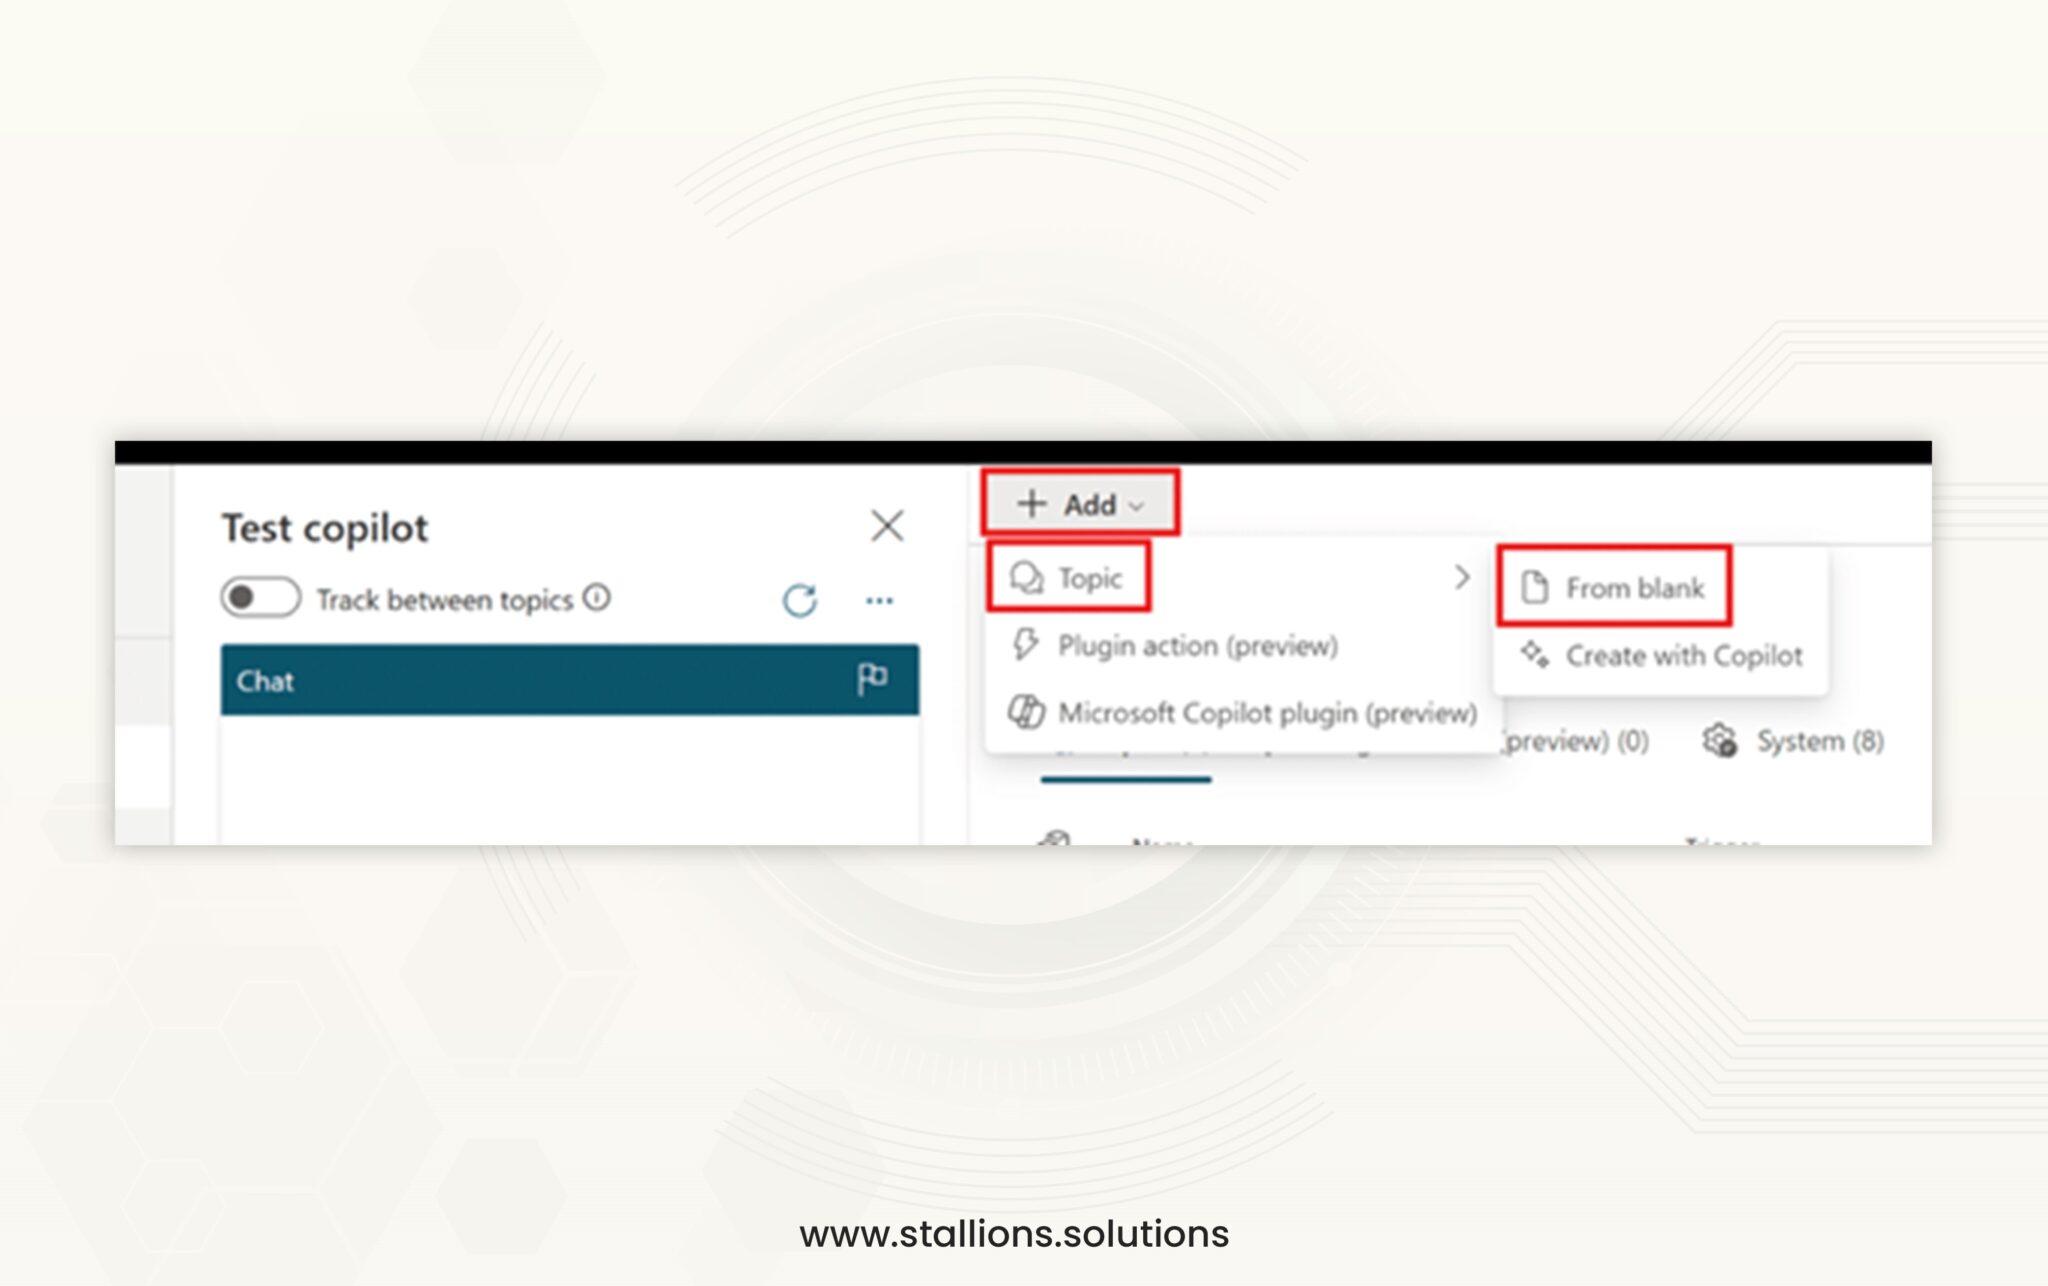
- Navigate to the menu, select “topics,” and click “add.” Then, pick “topic” and choose for “From blank.”
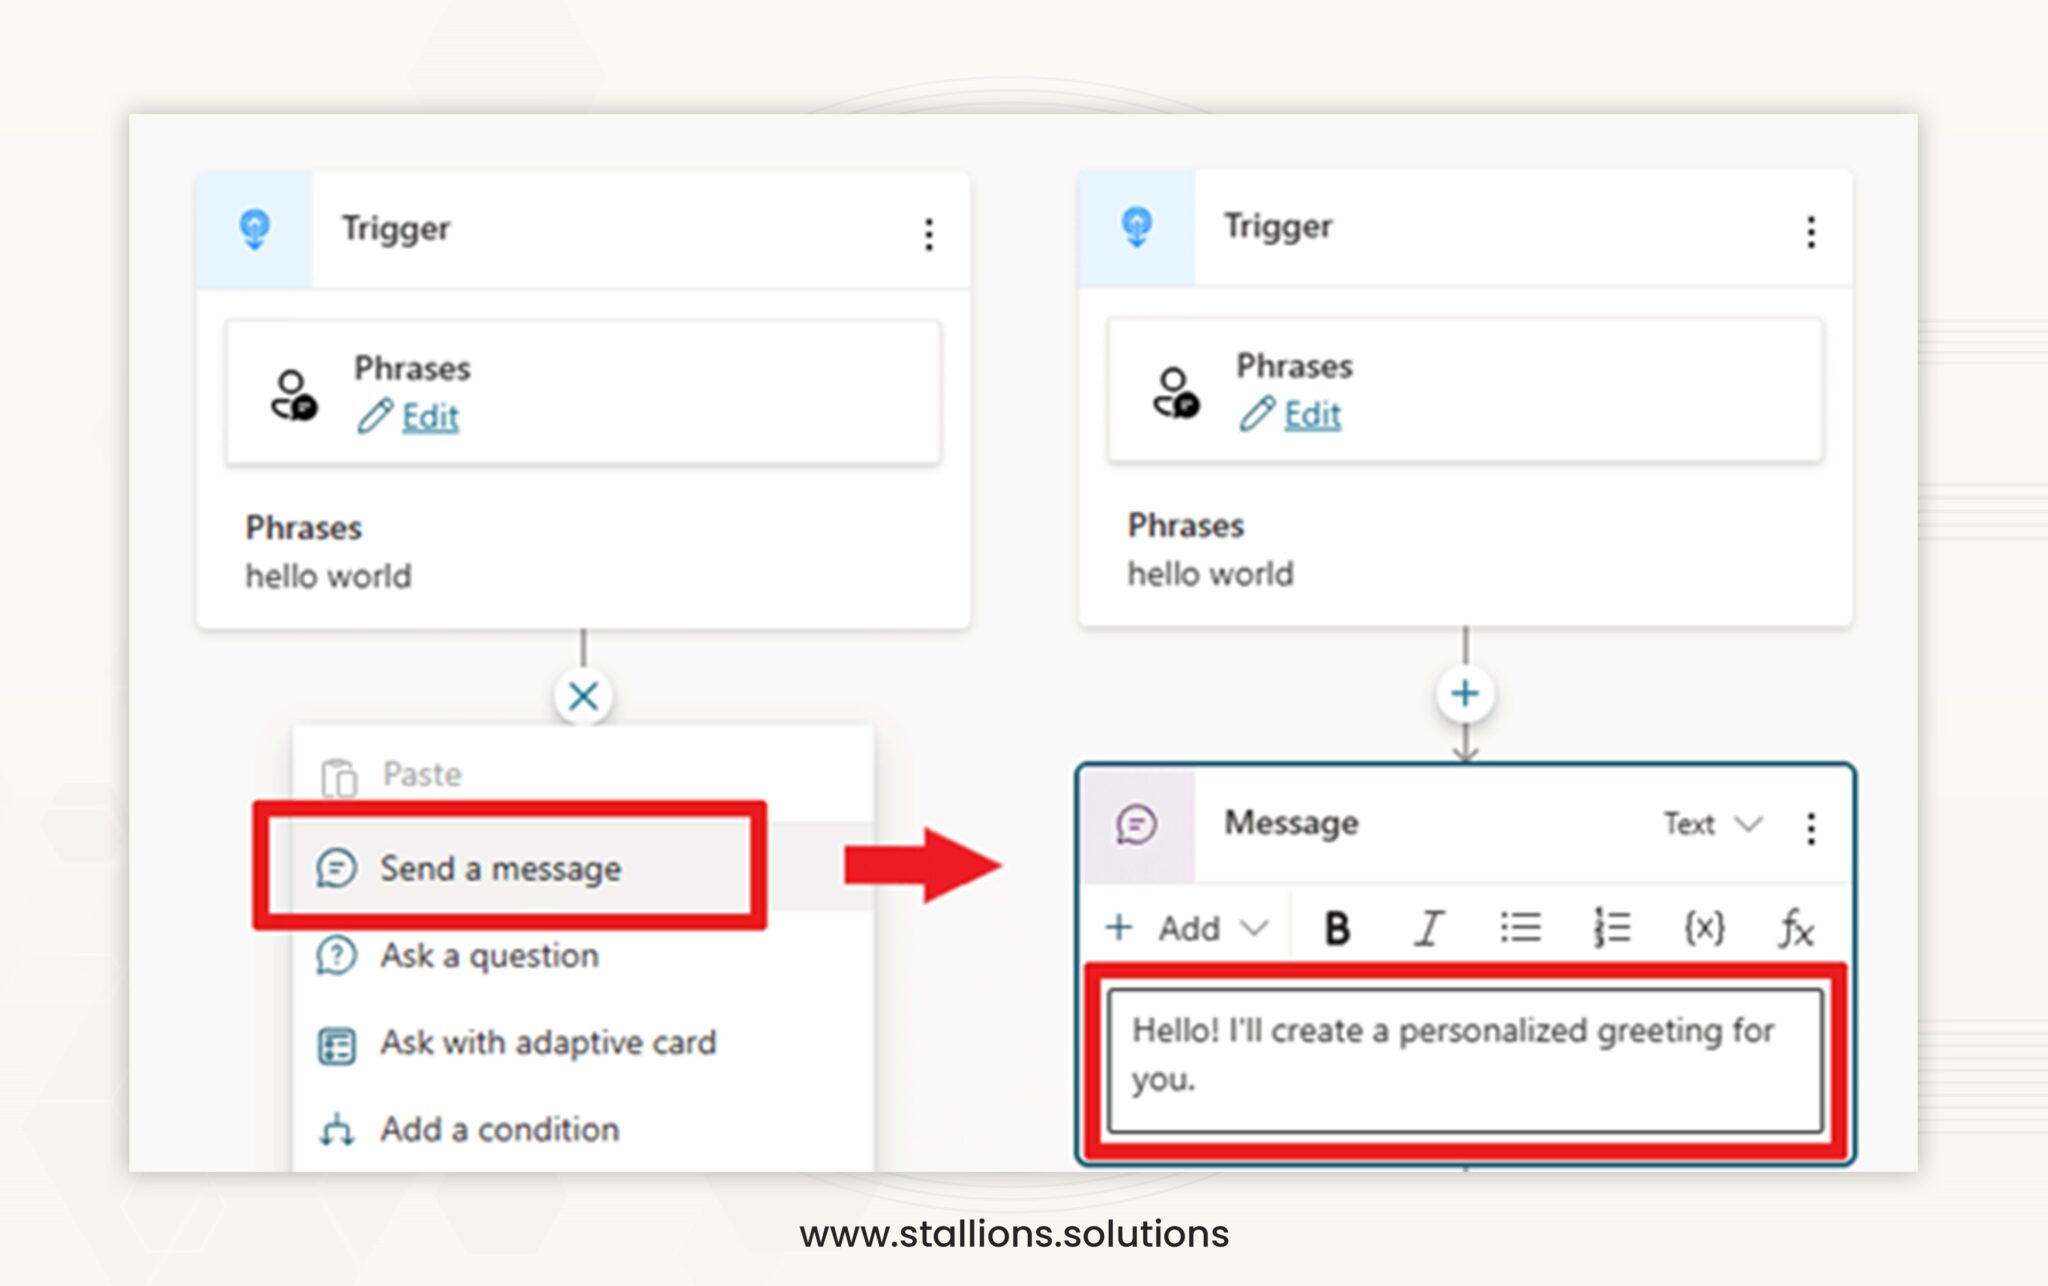
- Name your topic and create a trigger by adding example questions that show your copilot how to answer when it hears a question. For example, call your copilot “Personal Hello World.”
- Select “Edit” from the trigger box under phrases.
- The dialogue box labeled “On Recognised Intent” will open.
- In the “Add phrases” field, type “Hello world.”
- Select the “+” icon to add it into your trigger.
- To save the trigger, click the Save

Settings Your Messages in Copilot
- Click the “+” icon to select “Send a message” below the trigger node.
- Include “Hello!” in the message node. I’ll make you a customized greeting.
- Click the “Save” icon to save your trigger.
- To add an Ask a question node, use the “+” icon located beneath the message
- Enter “Where do you live?” in the Ask a Message box.
- Select the Multiple-choice option under Identify to allow the user to select their preferred response.
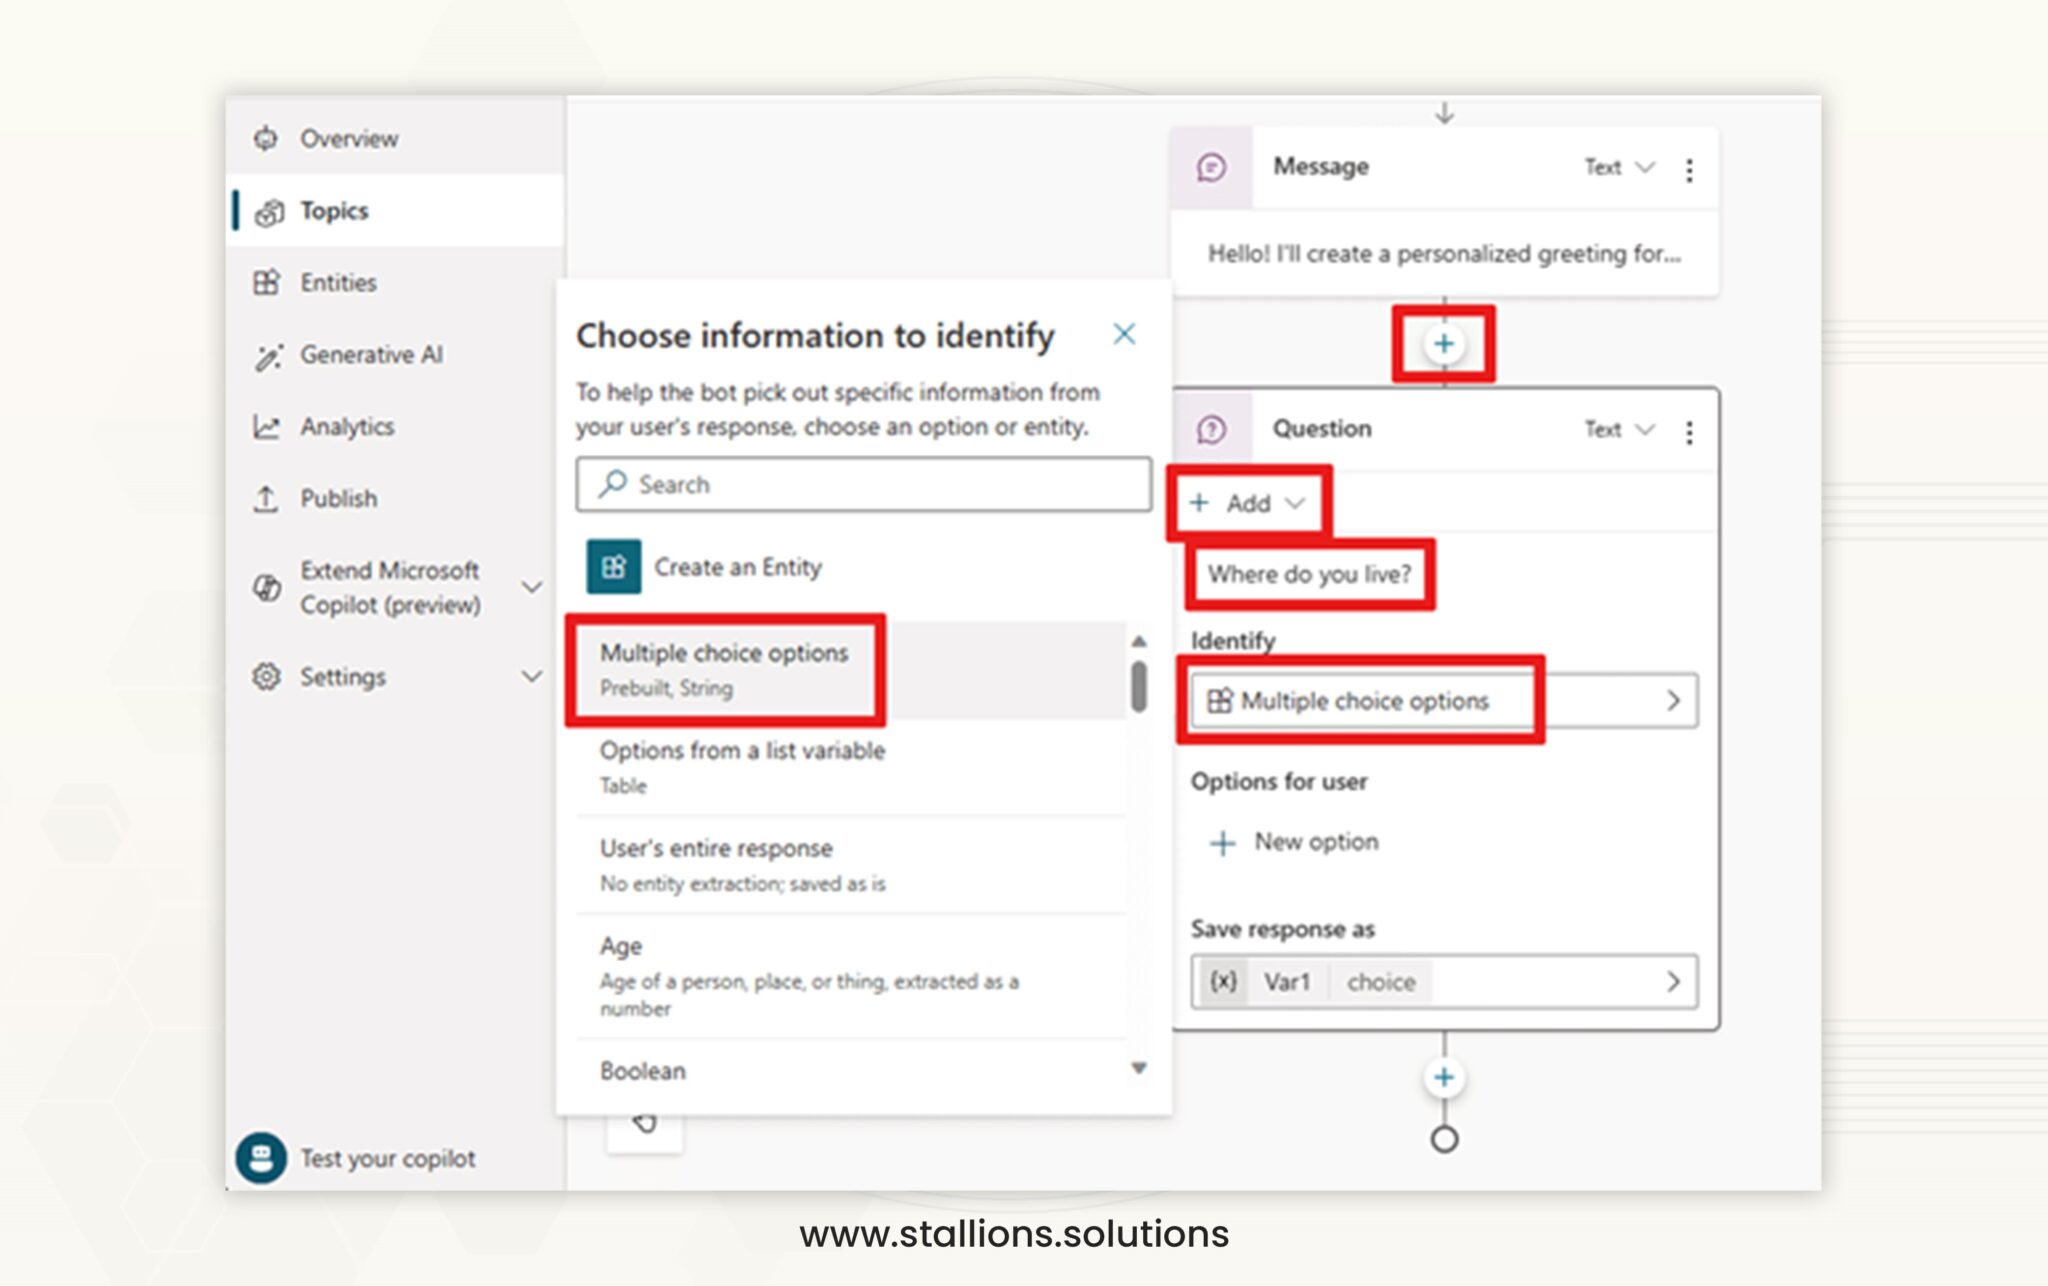
- More options must be added if you select “multiple choice options.”
- Select + New option in the Question node’s alternatives for a user and add two alternatives for the user. Enter “Seattle” in text format. Next, include an additional choice and enter “Bellevue.”
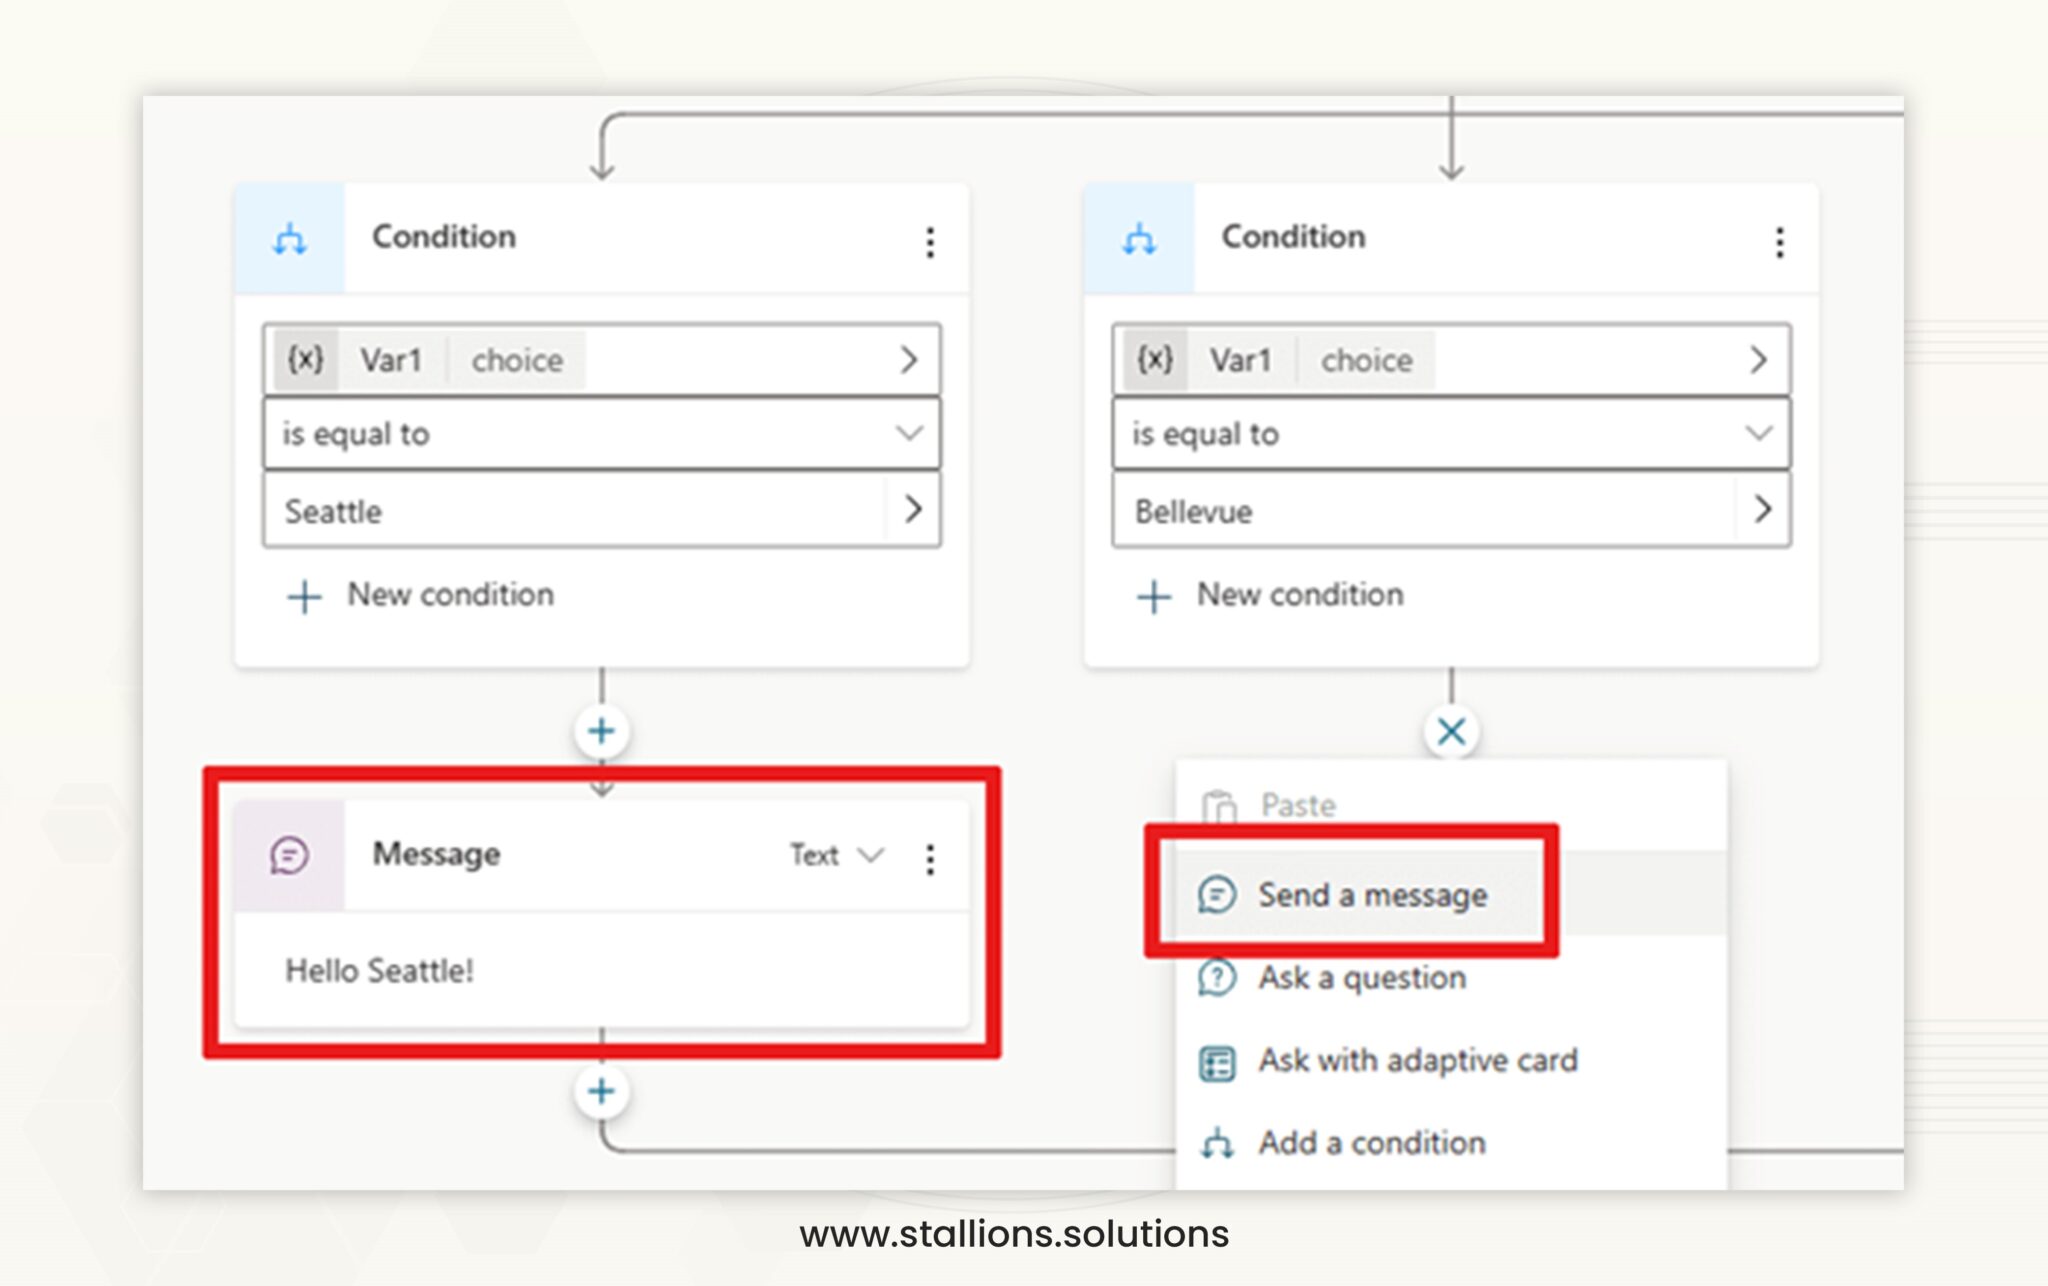
- You can view the complete dialogue tree in the authoring canvas at the same time to see how the conversation flows. The conversation’s course is divided by the tree based on the user’s response.

- The final step is to choose the “+” icon below each condition note for adding a message node in each brand. In this scenario, add “Hello Seattle!” in the Seattle branch and “Hello Bellevue!” in the Bellevue branch.
- Click on the “Save” icon to preserve your trigger.
You have now successfully set up a simple branching dialogue tree. Utilize the “Test your Copilot” section to verify the dialogue’s flow is as intended. Make any required modifications to ensure the dialogue meets your objectives. Be aware that changing the content will not be possible once the Copilot is activated.
Steps To Publish Your Copilot
Once you’ve checked and updated the content in your copilot, you can publish it immediately. Simply follow these steps:
- Navigate to the menu and select “Publish”.
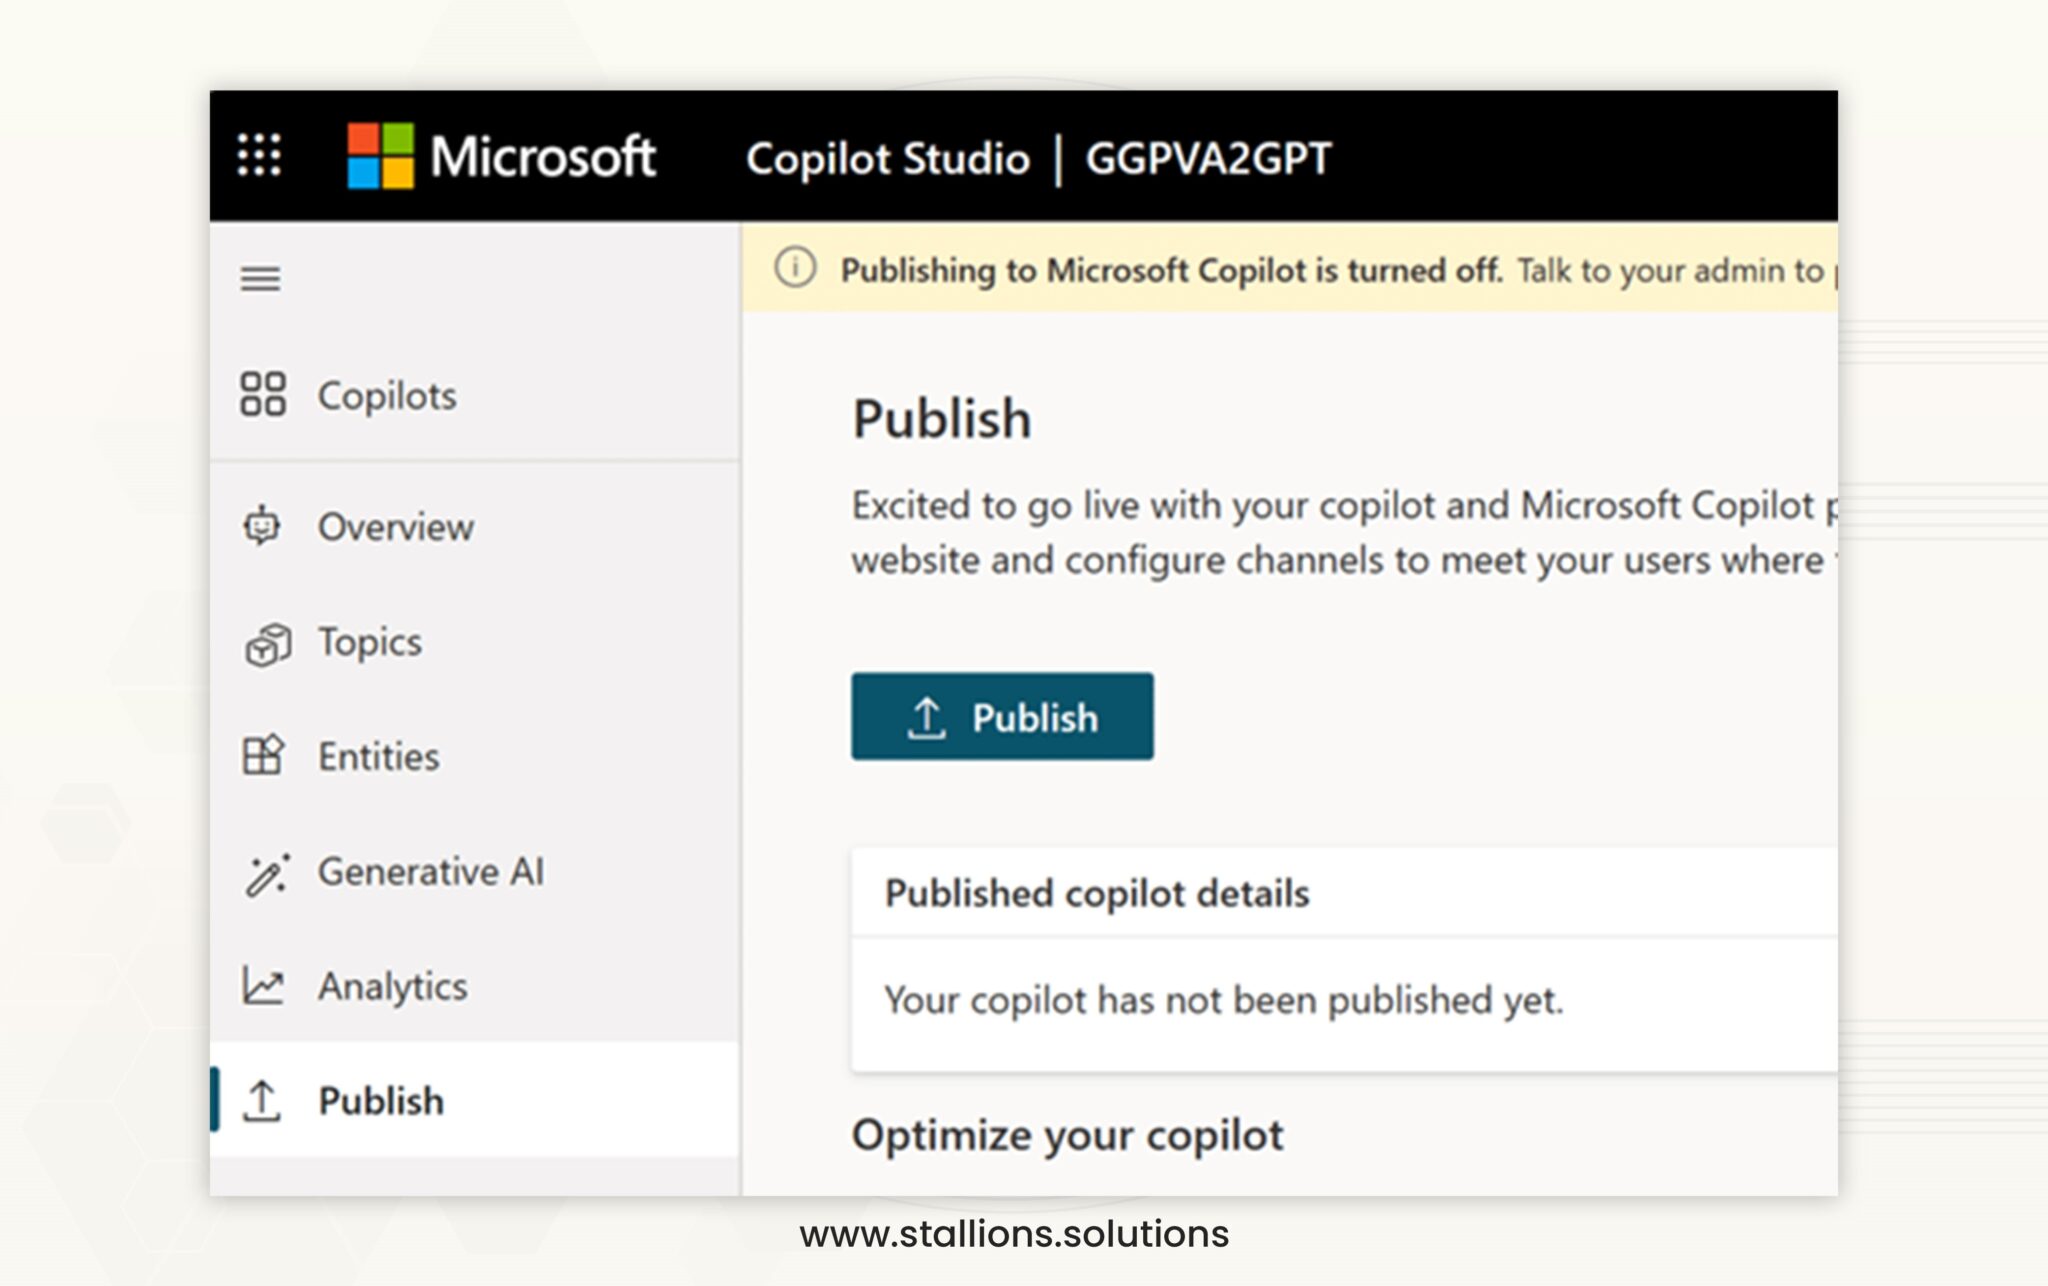
- Upon activating your copilot, a green banner will appear at the top of the page.
- Click the “Share your copilot” link to view your copilot in action on a sample website.
Assess Your Copilot Performance
You can test your copilot’s performance because analytics records its statistics when interactions are finished. Select “Analytics” from the navigation menu to view this data. KPIs, or key performance indicators, consist of:
- The number of handled sessions
- Efficiency in involving people and addressing problems
- Rates of escalation to human agents
- Rates of abandonment during dialogue
You can select “Sessions” after selecting “Analytics” to get a comprehensive session history and transcripts.
Conclusion
Microsoft has simplified the integration of Generative AI into our daily activities, eliminating the need for technical know-how.
You can equip your workforce with sophisticated tools by directly creating and implementing copilots via Copilot Studio. This enhancement in productivity allows them to focus on essential activities that contribute to the company’s value.