Dynamics 365 is a powerful platform offering a range of tools to manage customer relationships, sales, and more. One of its key features is the sitemap, which provides users with a navigational structure to access various entities and functionalities within the system. Adding an entity to a sitemap can streamline user experience and improve accessibility. This blog post will guide you on how to add an entity to a sitemap in Dynamics 365, helping you enhance your CRM setup.
Understanding the Dynamics 365 Sitemap
Before diving into the steps, it’s essential to understand what a sitemap is. The sitemap in Dynamics 365 serves as the navigation menu for users. It contains links to various entities, dashboards, and other components. Customizing the sitemap can make it easier for users to find and interact with entities, improving overall productivity.
Prerequisites
To add an entity to a sitemap, you need to have:
Administrative Access
You must have sufficient permissions to customize the sitemap.
Dynamics 365 Environment
Ensure you have access to your Dynamics 365 instance where you want to make changes.
Basic Knowledge of Dynamics 365 Customization
Familiarity with the Dynamics 365 customization tools and concepts is beneficial.
Steps to Add an Entity to a Sitemap in Dynamics 365
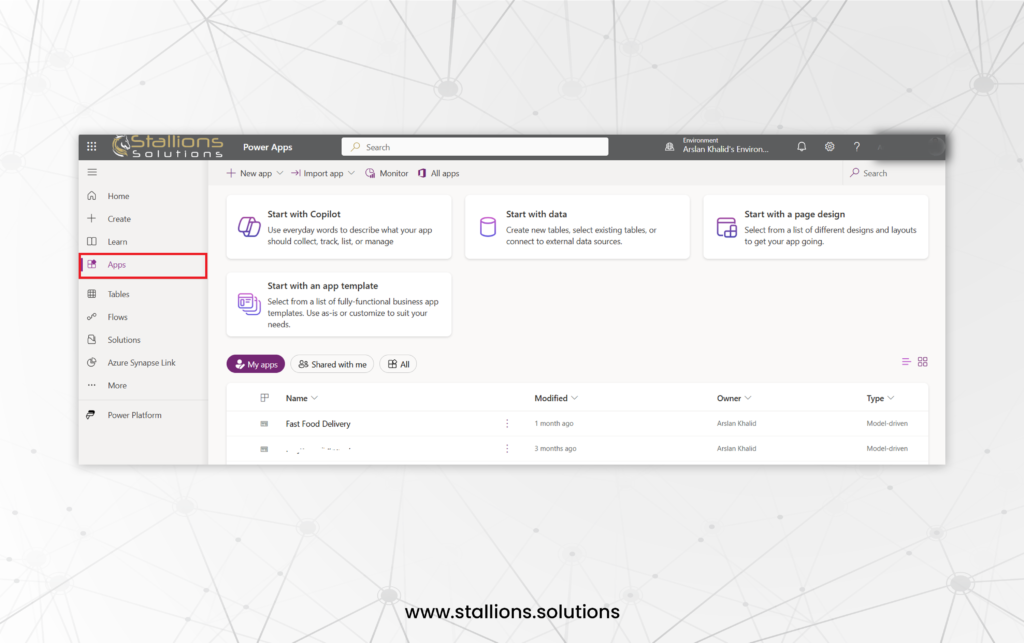
1. Open the Dynamics 365 App Designer
Navigate to your Dynamics 365 environment and access the app designer. Follow these steps:
- Go to the Power Apps portal: [Power Apps Portal]
- From the left navigation pane, select Apps.
- Find the app you want to modify and click on it to open the app designer.
2. Access the Sitemap Editor
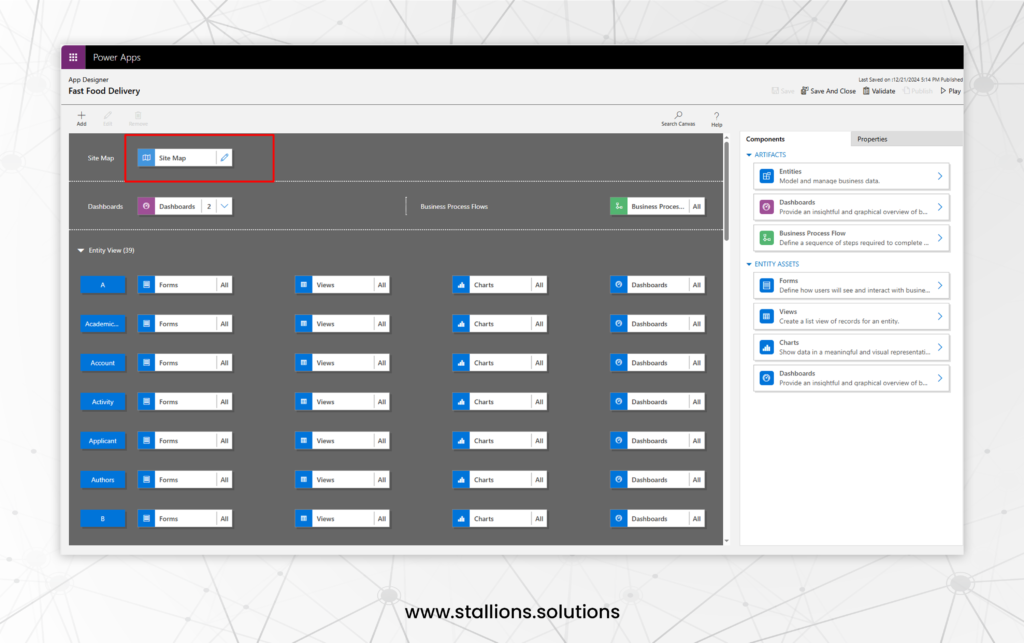
Once you are in the app designer, you’ll need to access the sitemap editor:
- In the app designer, locate and click on Sitemap in the left-hand panel.
- This will open the sitemap editor where you can make changes to the navigation structure.
3. Add a New Group (Optional)
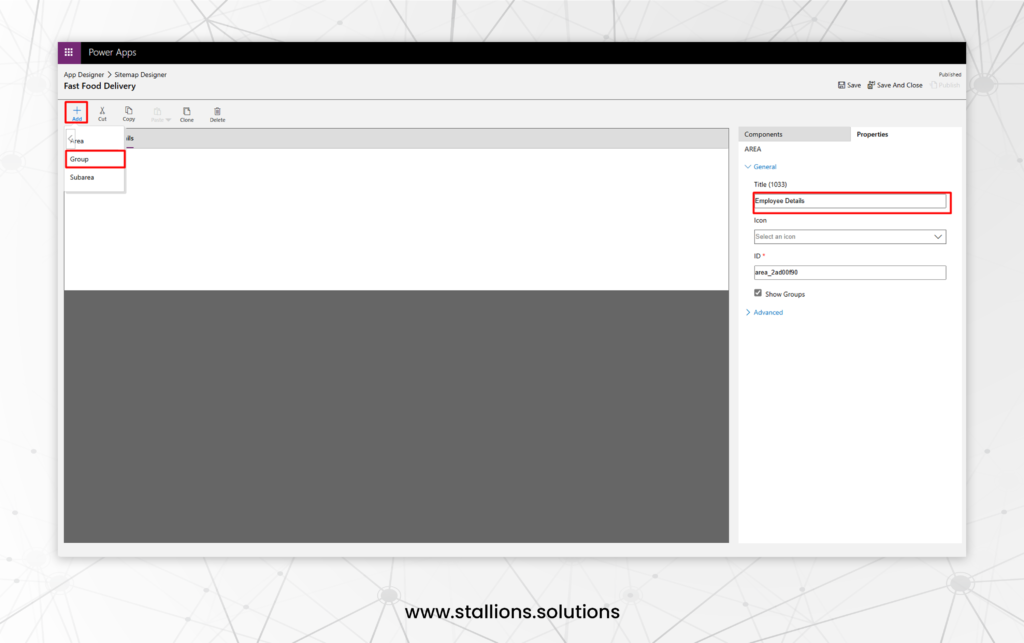
If you want to add the entity to a new section of the sitemap, you may need to create a new group:
- In the sitemap editor, click on Add to create a new Group
- Name the group appropriately (e.g., “Sales Entities” or “Customer Data”).
- You can customize the appearance and order of this group as needed.
4. Add a New Subarea
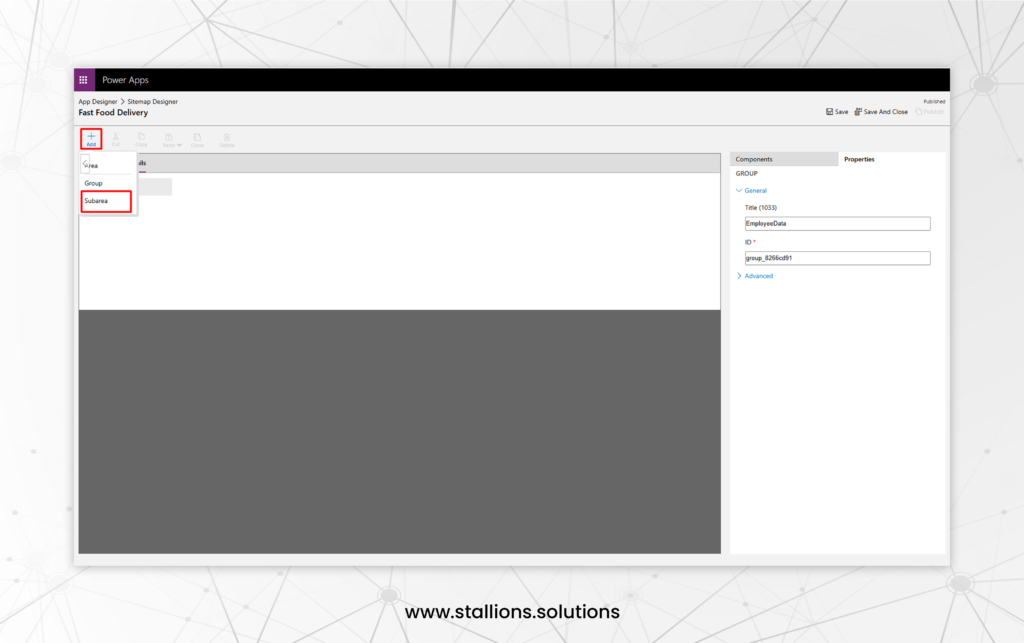
Now, you’ll add the entity to the sitemap as a subarea:
- Within the sitemap editor, navigate to the section where you want to add the entity (either in an existing group or a new one).
- Click Add and choose Subarea from the dropdown menu.
- Select Entity as the type of subarea.
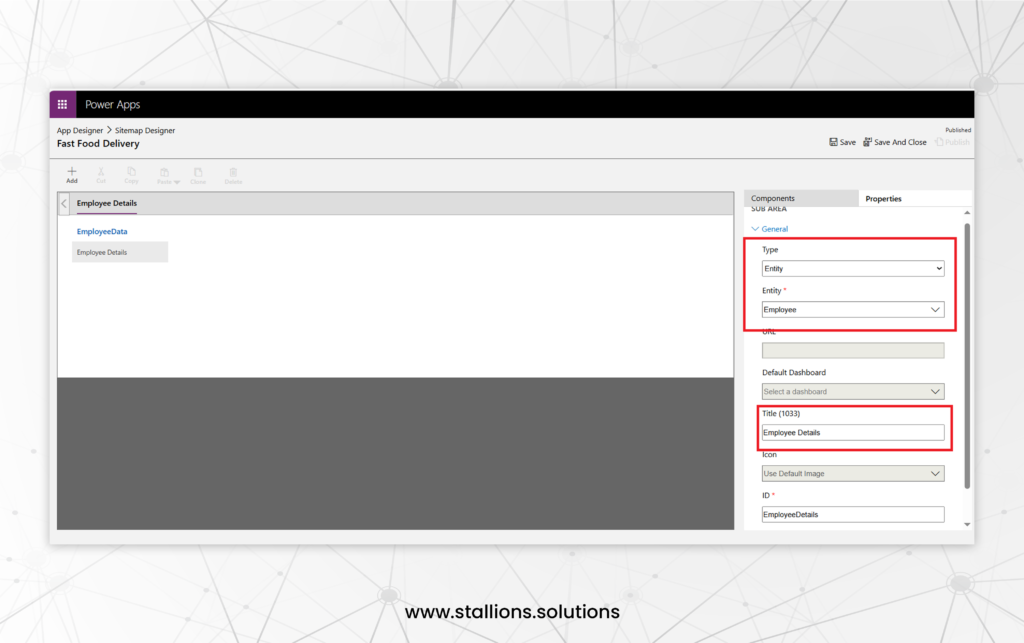
5. Configure the Entity Subarea
After selecting Entity, configure the subarea:
- Title: Enter a title for the entity that will appear in the navigation menu.
- Entity Name: Select the entity you want to add from the dropdown list. This list includes all entities available in your Dynamics 365 instance.
- Icon (Optional): You can choose an icon to represent the entity, making it easier for users to identify.
6. Set the Display Options
Customize how the entity will appear in the sitemap:
- Display As: Choose whether you want the entity to be displayed as a link or a list.
- Order: Set the order of the entity within its group or section.
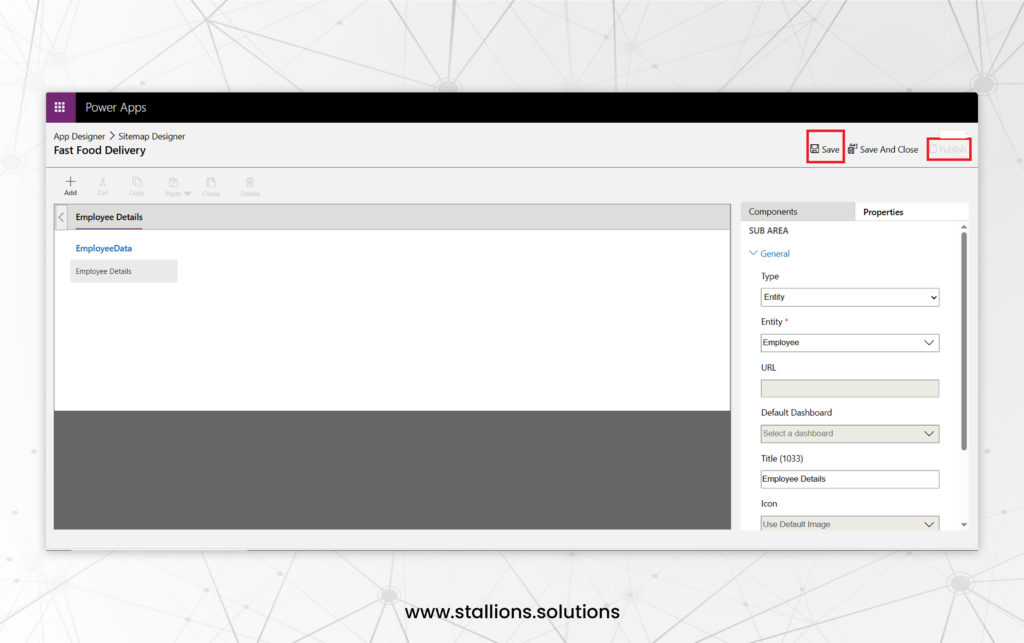
7. Save and Publish Changes
Once you have configured the entity and its display options, save your changes:
- Click on the Save button to save your changes.
- To make the changes live, click Publish. This will update the sitemap in your Dynamics 365 environment.
8. Test the New Sitemap Configuration
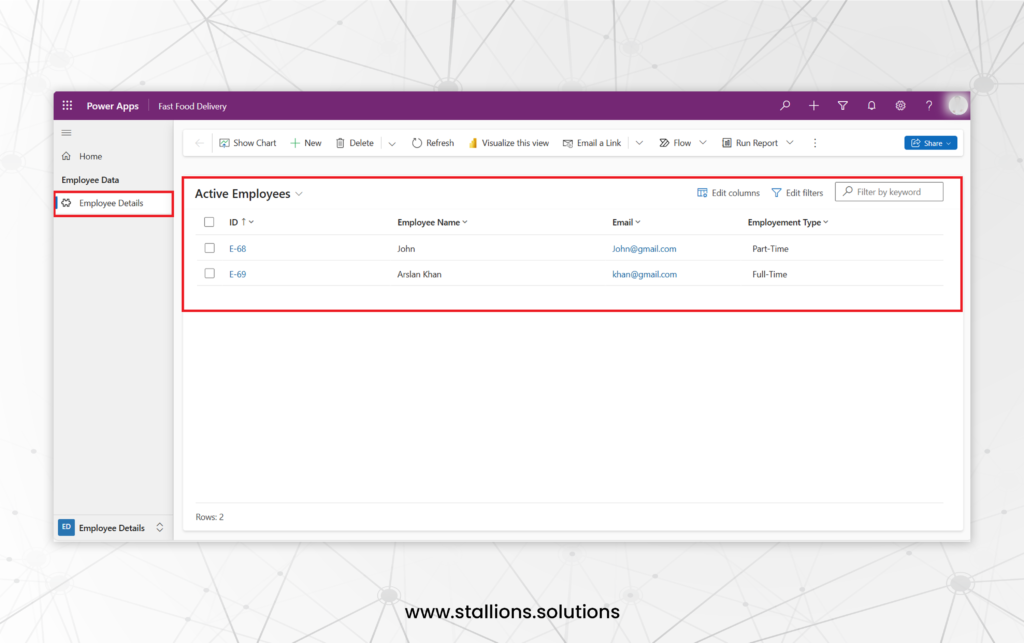
After publishing, it’s essential to test the new sitemap configuration:
- Go back to the Dynamics 365 main interface and refresh the page.
- Navigate through the sitemap to ensure that the new entity appears as expected and that the links are functioning correctly.
Best Practices for Customising the Sitemap
- Keep It Simple: Avoid cluttering the sitemap with too many entities. Focus on the most relevant and frequently used entities to maintain a clean, user-friendly navigation experience.
- Use Descriptive Titles: Ensure that the titles of entities are descriptive and easily understandable to help users quickly find what they need.
- Organize Logically: Group related entities together to create a logical flow in the sitemap. This helps users navigate the system more efficiently.
- Regular Updates: Regularly review and update the sitemap to reflect any changes in your organization’s processes or entity structures.
Conclusion
Customising the sitemap in Dynamics 365 by adding entities is a straightforward process that can significantly enhance the user experience. By following the steps outlined in this guide, you can make important entities easily accessible, streamline navigation, and improve overall efficiency within your Dynamics 365 environment. Remember to keep your sitemap organized and user-friendly to maximize its benefits.
Feel free to reach out if you have any questions or need further assistance with Dynamics 365 customisation.


